Let’s design stunning stationery
Custom stationery speaks volumes about your client. As a designer, you have a lot of tools to bring their style to life. Here’s how to deliver a design they’ll love.

by CogitoDesigns
Your client just ordered stationery (score!) but you’ve got some questions. Have no fear, 99designs is here. Read on for specifications, design do’s & dont’s, and a glossary of design terms. It’s everything you’ll need to hand-off an awesome design.
Talk to your client first
Designing stationery is usually pretty standard, but there's still a few important questions you need to ask your client before getting started.
The pre-design checklist
- Does your client have a brand or style guide?
Talk to your client beforehand to see if they have a brand or style guide. This will help ensure you’re staying consistent with their company’s brand elements like logo, colors and typeface. - Does your client want a specialty printing technique or finish?
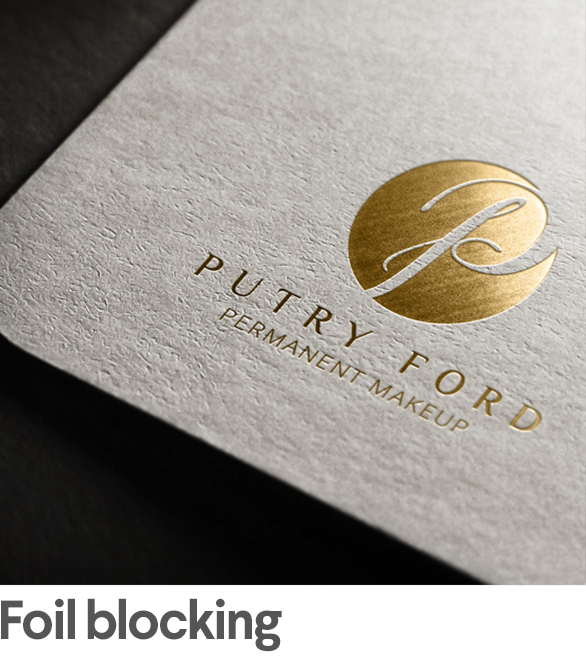
Ask if your client’s printing budget allows for advanced techniques like embossing, foil blocking or die-cutting before adding them into design. - Will this design be printed by a personal or a commercial printer?
Ask client if they're printing themselves or at a commercial printer. Don’t use borders unless the letterhead will be professionally printed.
- Will this design be printed on a special type of paper?
If it is, you may need to adjust your design to work with that type of surface. - What type of stationery is it?
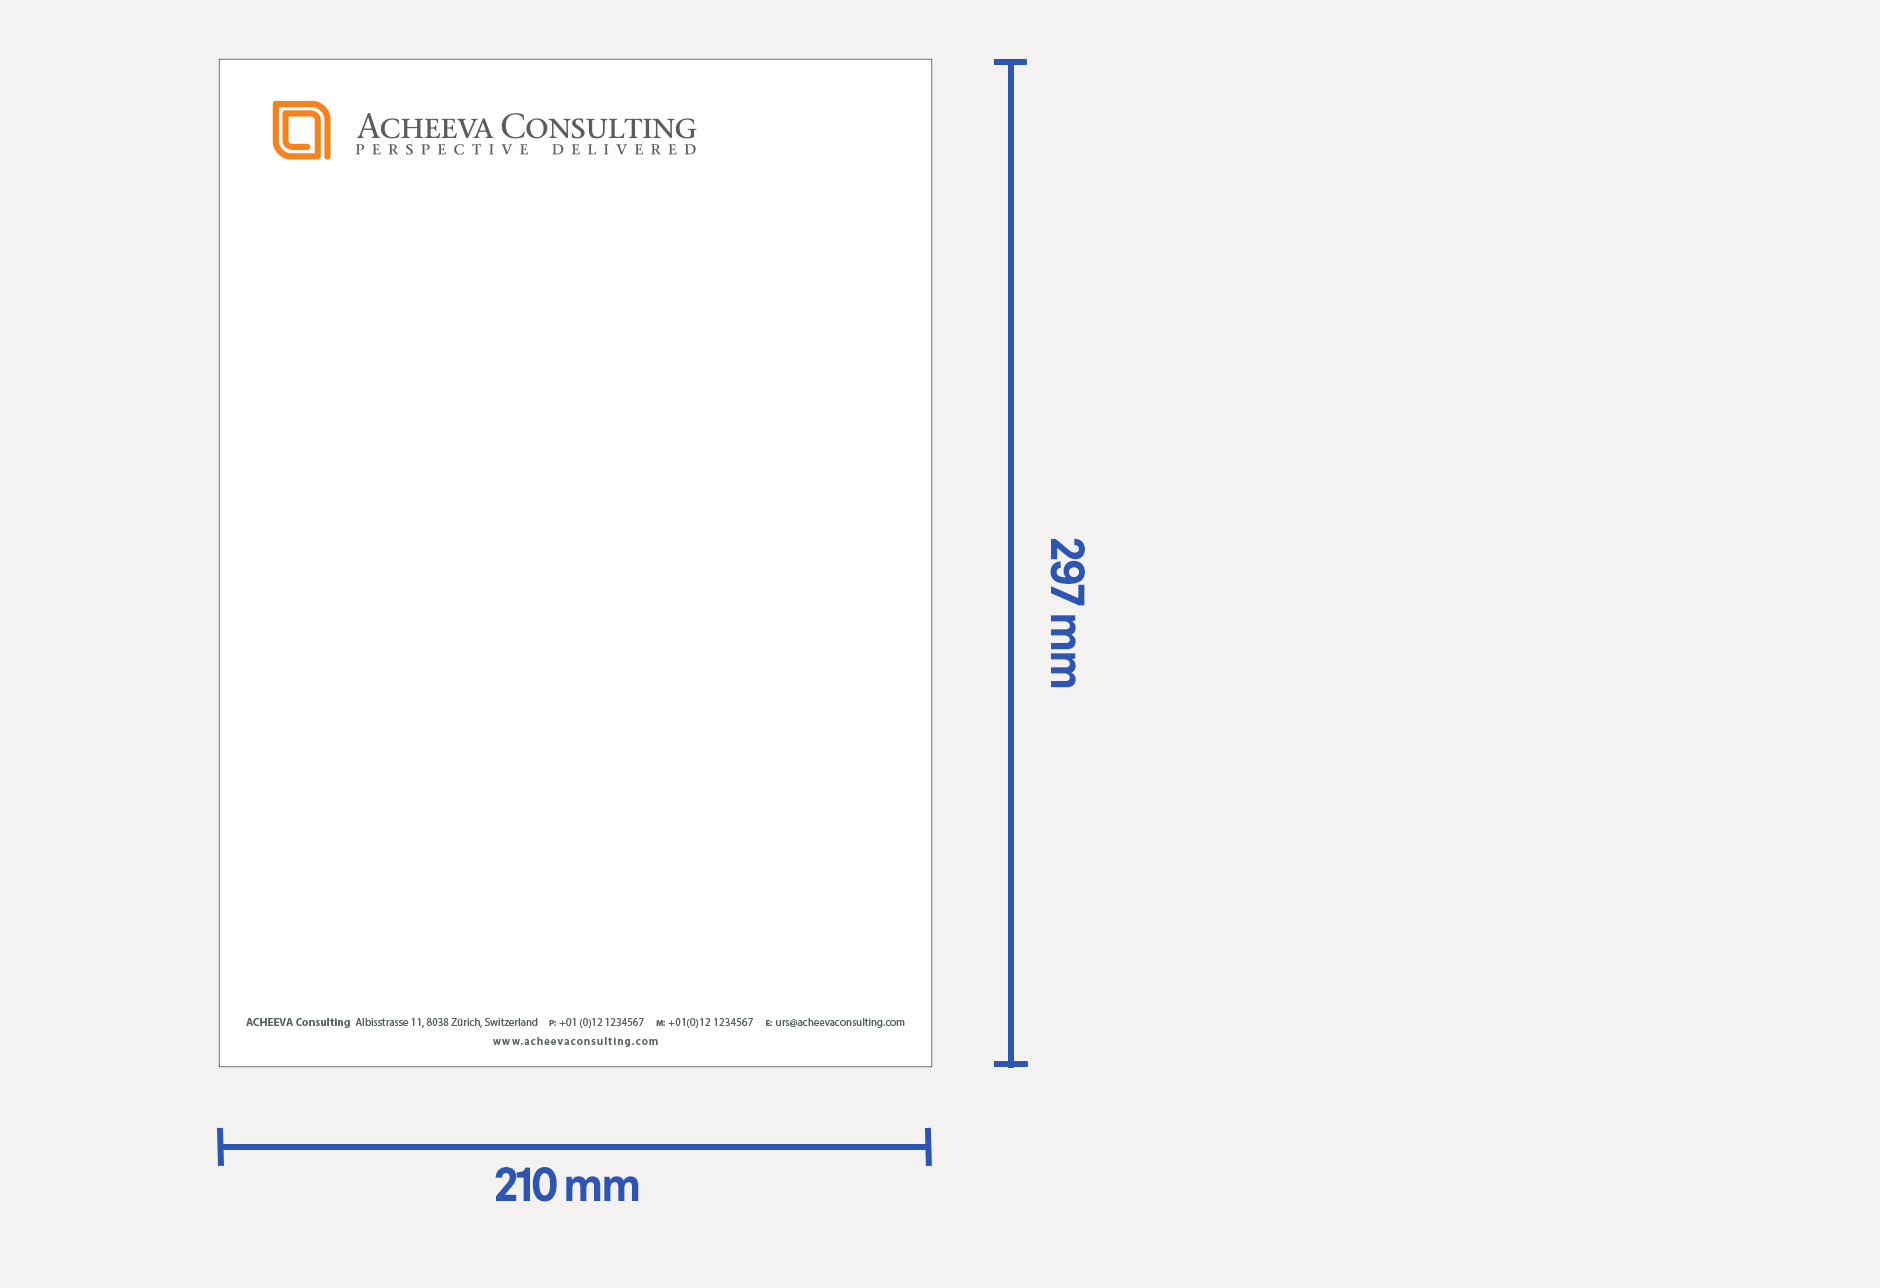
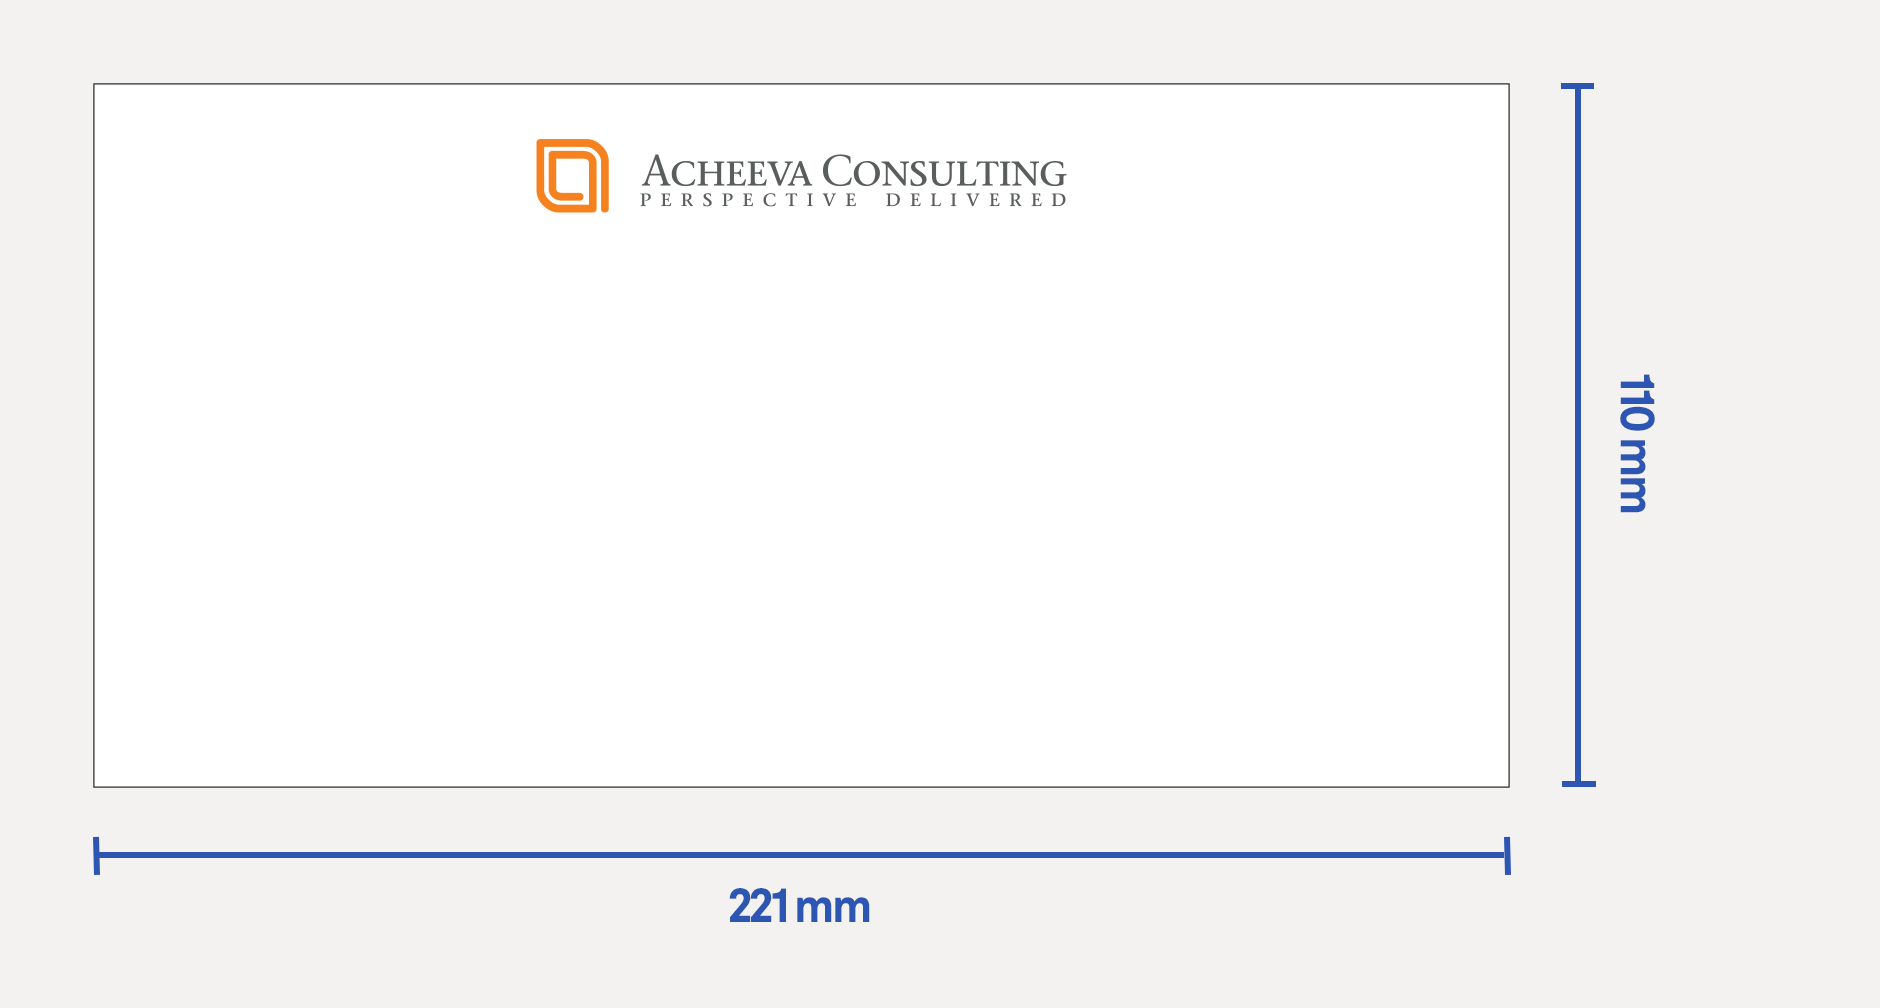
Confirm size and specifications for each piece before you start designing (standard sizes are listed below)

Size and specifications
Yes, “sizes and shapes may vary,” but standard stationery can still stand out. The most common sizes are slightly different for printers in America and the rest of the world.
Follow these specifications to ensure your letterhead and envelope designs print correctly. But if your client wants a special shape, you’ll need to request specifications directly from them.
US letterhead


Finishing a stationery design
The post-design checklist
- Is the client using a commercial printer?
Remove any letterhead borders if your design will be professionally printed. - Did you leave room on your envelope?
Don’t forget to leave space for stamp, return address and the back on envelopes. - Have you checked your bleed?
Ensure all text is within the safety line and all imagery is stretched to the bleed.
Handover
Once your client has approved the final design, send them all of the design files. Here’s what they need:
- An editable version of the final design (AI, PSD, PDF, EPS or INDD)
- All web preview images (JPEG or PNG)
- A link to purchase any commercial fonts used in the design
Make sure all files are saved in the CMYK color mode and 300dpi resolution.

The dictionary of design
CMYK and RGB... droids from Star Wars, right? Design lingo can be a little tricky, but we can translate. Here are some design and printing terms you’ll need to know.
Color mode
The color mode is how to represent colors in your design. When designing for print, you should be sure to set up your document in CMYK mode.- CMYK: An ink-based mode used in print.
- RGB: A light-based mode used for digital and web design.
-
 by Leukothea
 -
by galinka


Bleed area, trim & safety lines
To ensure proper printing, you must include a trim, bleed area and safety line in your design.- Trim line: Where the printer cuts your image.
- Bleed area: The area beyond the trim line (typically an additional 0.125" on each side). You must extend your design out to the bleed area so none of your design is cut off.
- Safety line: Inside the trim line (typically an additional 0.125" on each side). All important text and imagery should be kept inside this line.
-
by Arthean
-
-


Resolution
Resolution is the amount of pixel detail in an image. When designing for print, you’ll need to create a high-resolution design at 300dpi.- High resolution: 300 dpi (dots per inch) keep image sharp.
- Low resolution: Too little info will make image pixelated.


Printing techniques & finishes
Sometimes clients will want something extra special for their stationery. Here’s a few of the things they may ask for.- 4-color offset: Standard, full color printing process
- 1- or 2-color: Limit color to accommodate limited budget
- Foil ink: Special process using metallic foil, not ink
- Spot color: Color generated by an ink (pure or mixed) printed using a single run.
-
by KreativeMouse
-
by shtremulator
-
by DSKY
-
by Alistair118


- Foil blocking: Stamp with metallic, foil finishes
- Embossing: Raise the texture of printed material
- Spot UV: Make certain areas of printed design glossier
-
by AlexandraMan
-
by Dimitry99
-
by Tica05


Want to learn more?
Gettin' technical
- An introduction to popular printing techniques
- 8 common print file mistakes and how to avoid them
- Prepress Checklist: How to prepare your design for print
- The 99designs guide to print-ready bleeds
- Cheat Sheet: Adobe InDesign shortcuts
- Cheat Sheet: Choose the right file types for your design
- What design files should I deliver to my clients?