Let’s design perfect product packaging
Top-shelf package design: that’s what your client needs to make their product pop. Here’s everything you need to dazzle them with stunning product packaging.

by THELOGOLOUNGE
Your client just ordered product packaging (score!) but you’ve got some questions. No fear, we’re here. Read on for specifications, design do’s & dont’s, and a glossary of design terms. It’s everything you’ll need to hand-off an awesome design.
Talk to your client first
Box, bag or bottle? There’s no such thing as “standard” packaging. Products come in all shapes and sizes. Luckily, your client should already know what they need. Contact them directly and ask them to send a template from their printer that you can work off of.
They should send you something that looks like this:
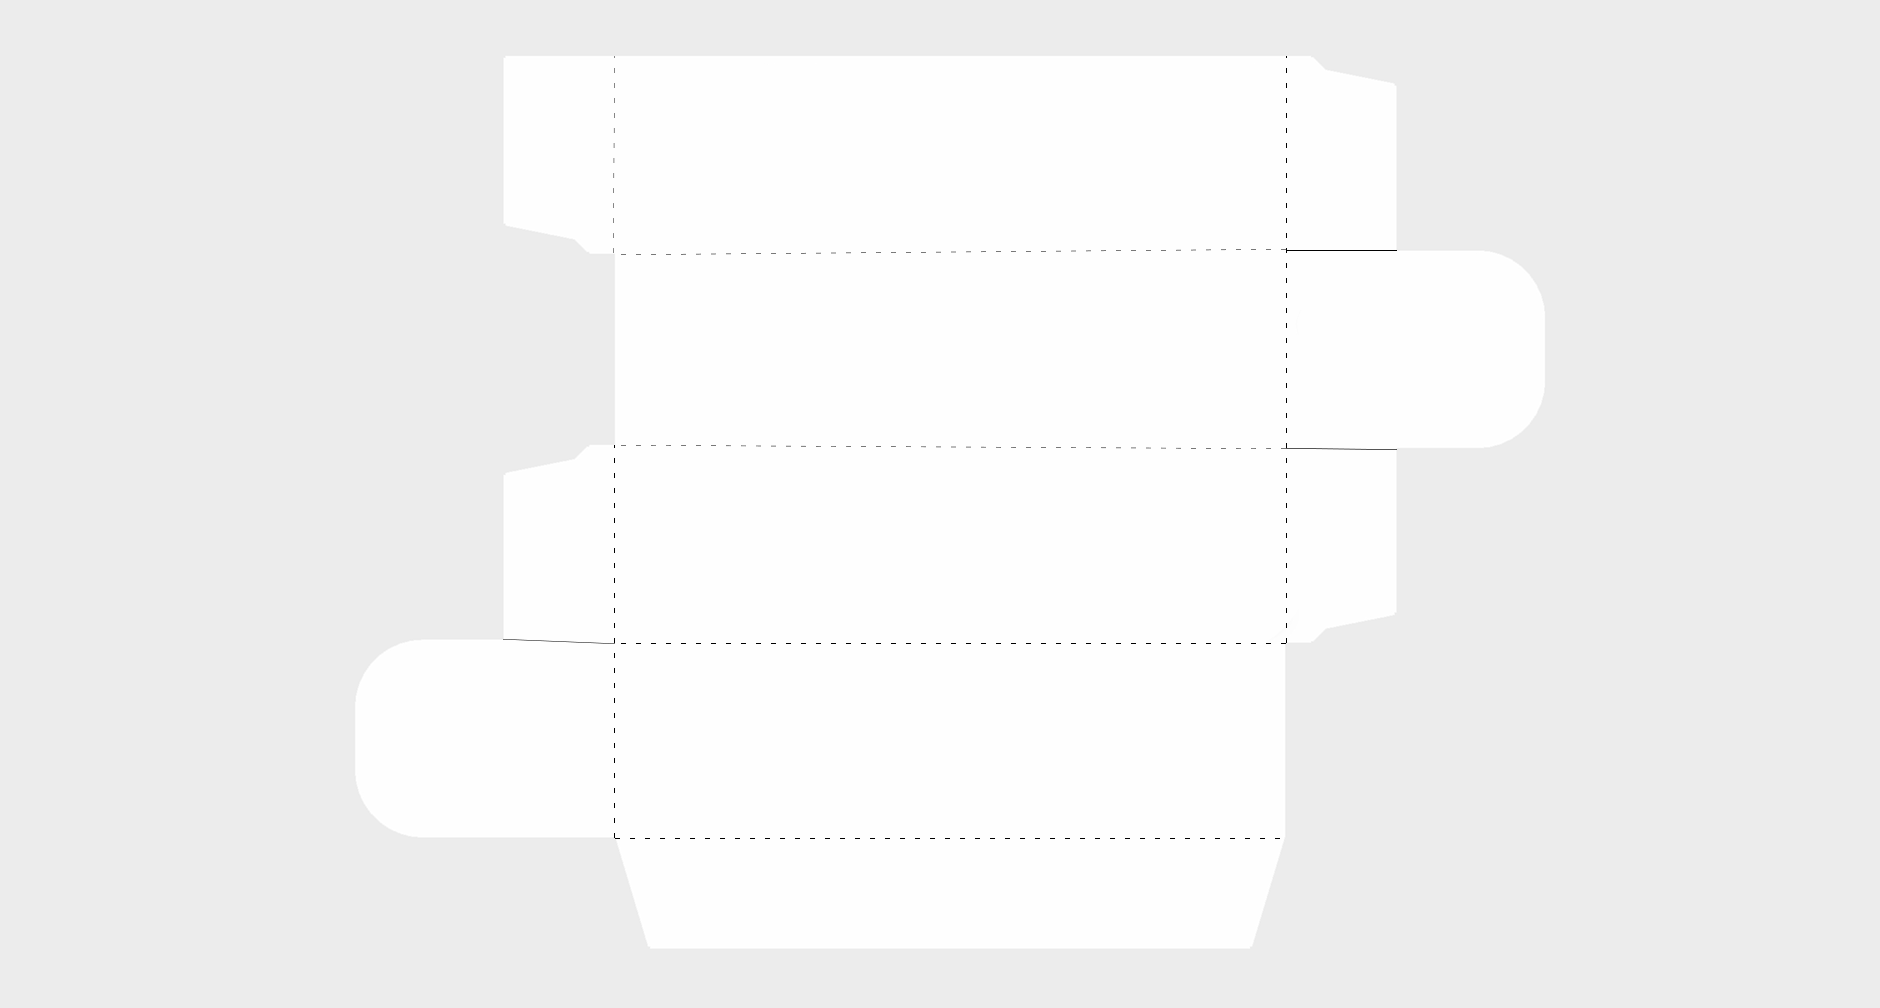
Use the template your client provides to complete your designs. If you have questions, don’t be afraid to reach out to your client or have them get you in touch with their printer directly.
If no template is available, contact your client to get as many specifications as possible, including packaging type (box, bottle, canister, etc.), dimensions and printing requirements. The more information you’re able to get, the fewer revisions you’ll have, and you’ll be able to deliver a better design.
If no template is available, contact your client to get as many specifications as possible, including packaging type (box, bottle, canister, etc.), dimensions and printing requirements. The more information you’re able to get, the fewer revisions you’ll have, and you’ll be able to deliver a better design.
The pre-design checklist
Here are some of the important questions you need to ask to your client before getting started:
- Do you have specific branding guidelines?
Confirm whether there is anything you need to include in your design, such as a logo or specific colors. - Understand what you’re designing
What’s the product? Who’s buying the product? Where are they buying the product? - Should the design be adaptable?
Determine whether you're designing for one product or a cohesive series of products. Double check if you need to adapt your design to a pre-existing style.
Designing for packaging
While packaging can be designed on anything you can dream up, there are typically six standard options for packaging:


Each type of packaging will have its own unique template and layout—but there are a few things that will stay consistent:
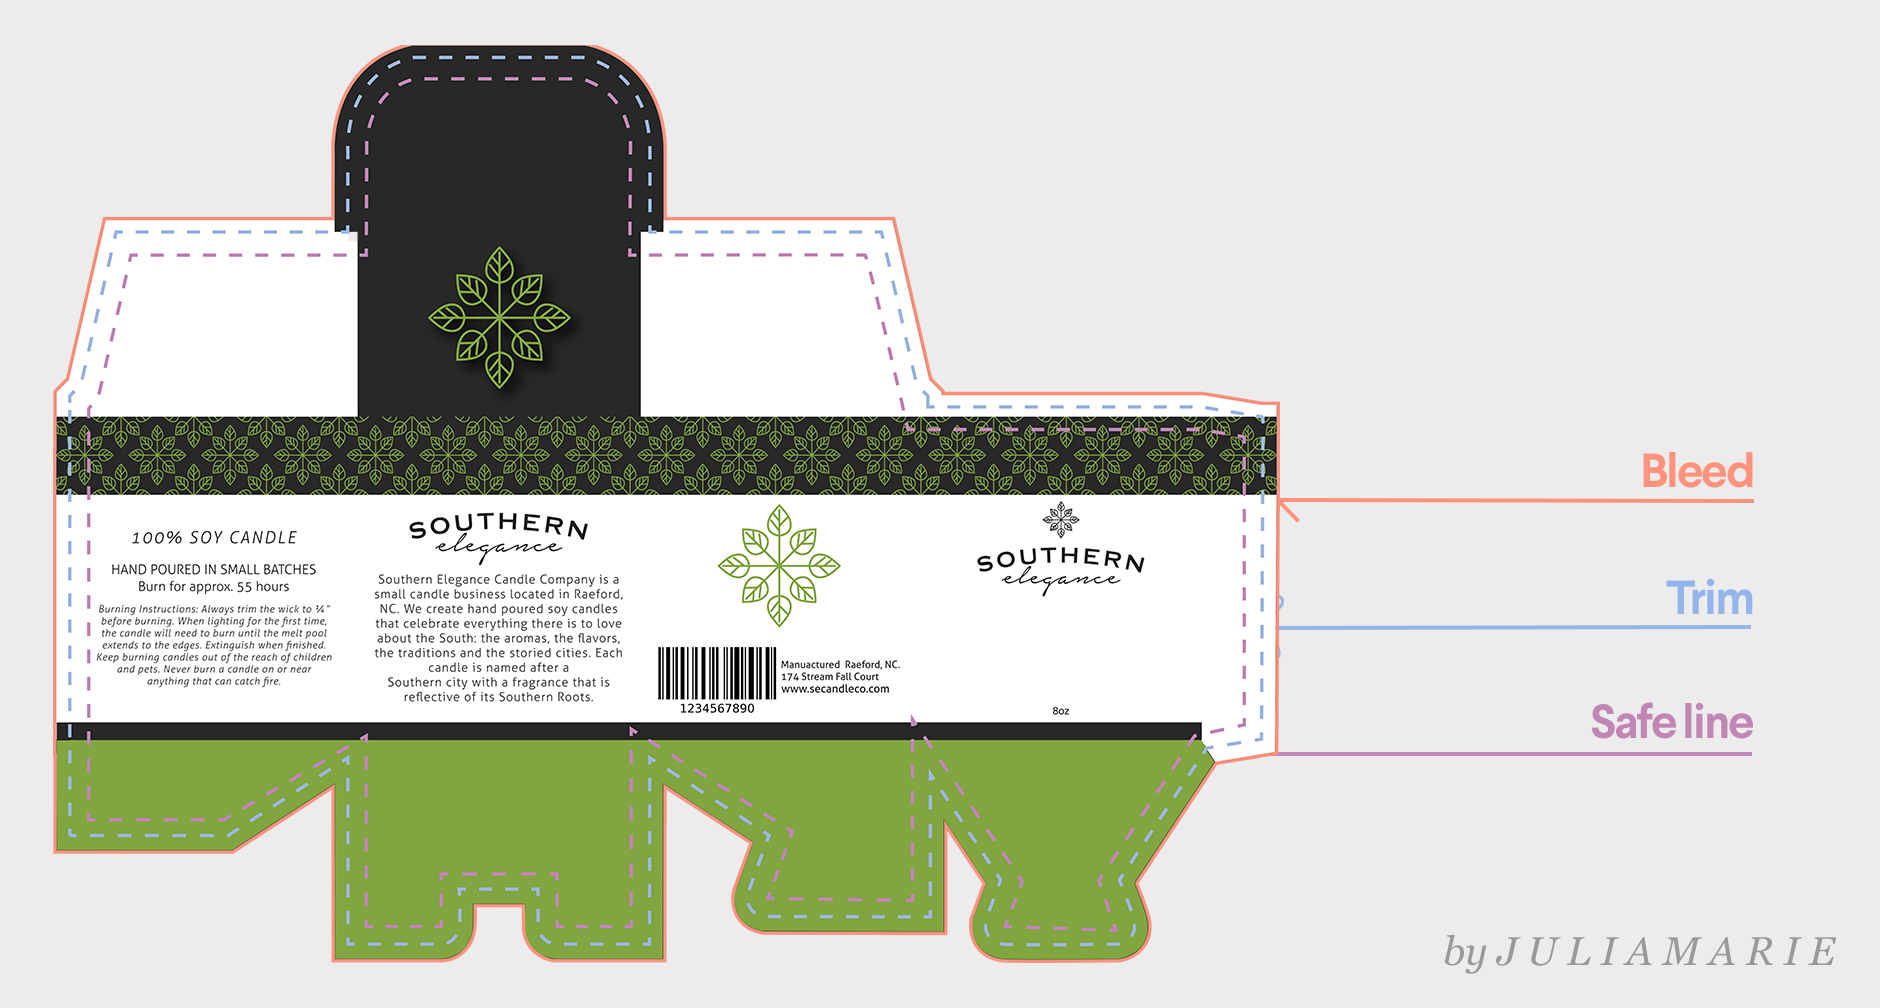
Every packaging template requires a Dieline, or the flattened pattern of your packaging used during layout.
A trim line is where the printer cuts your image. A bleed is the area beyond the trim line. You must extend your design out to the bleed so none of your design is cut off.
A safety line is placed inside the trim line (typically an additional 0.125” on each side), and all important text and imagery should be kept inside this line.
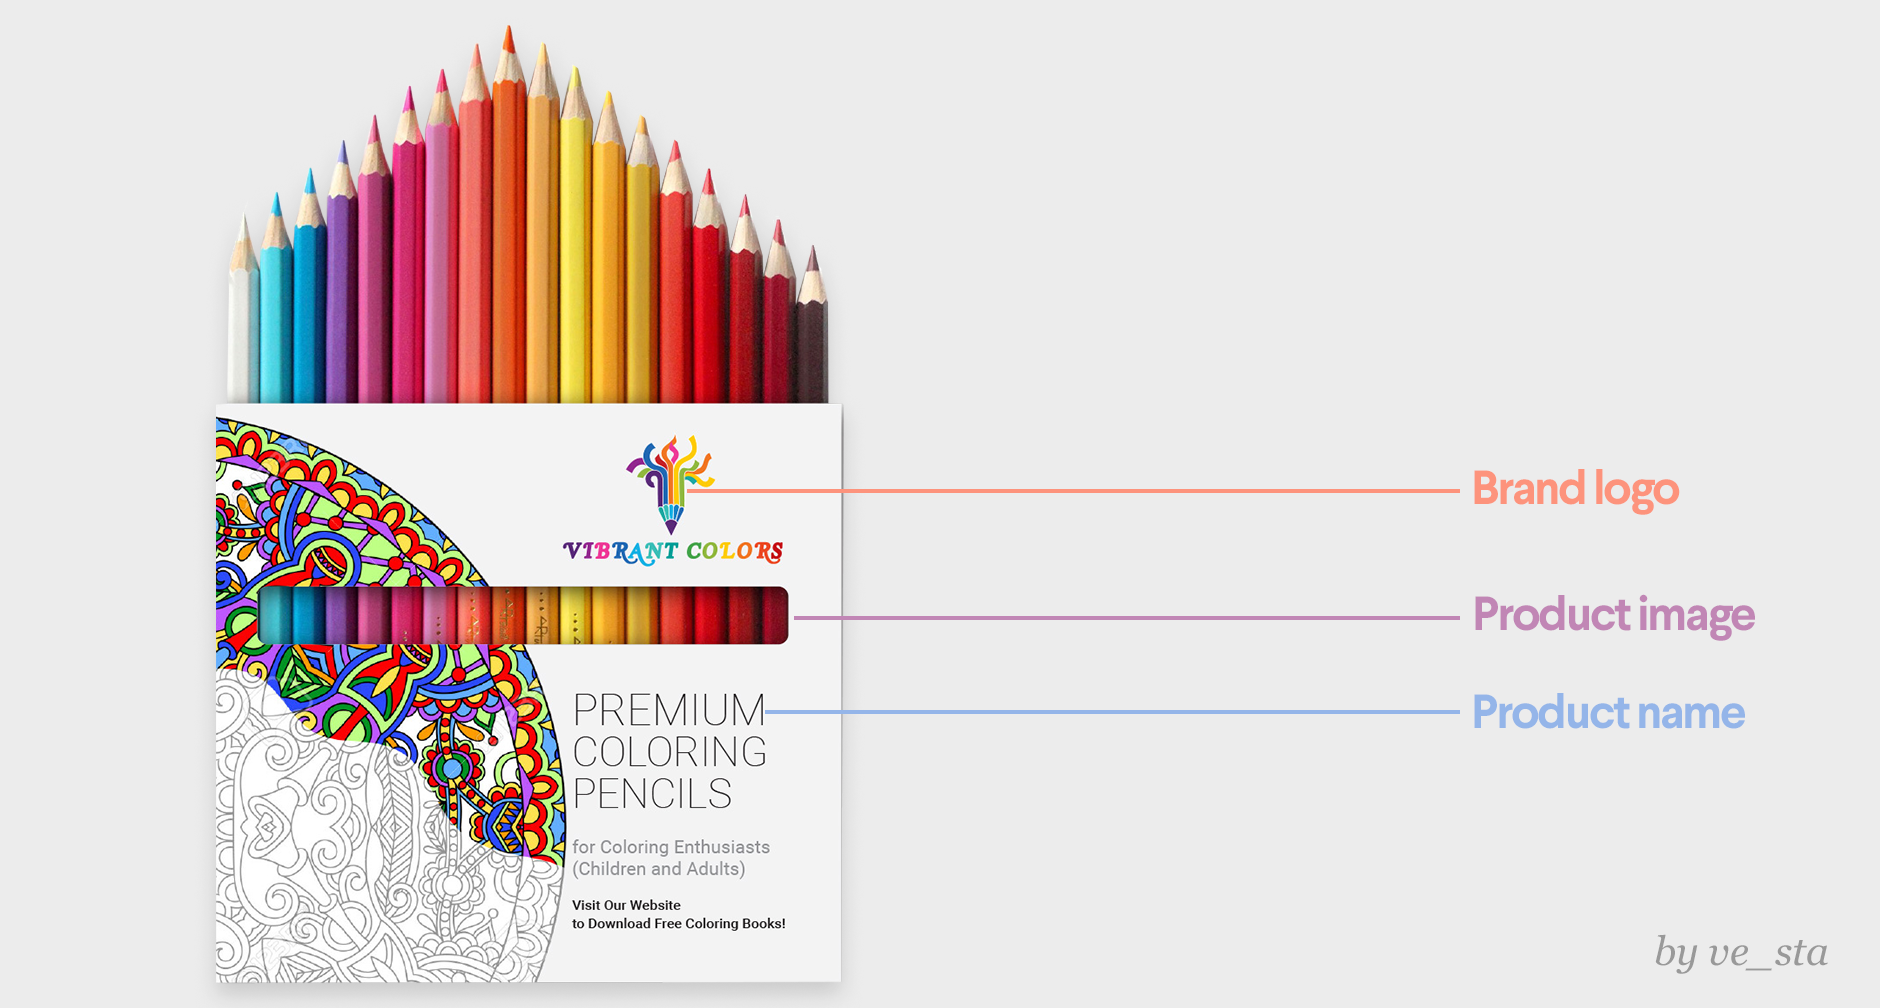
Components of packaging
While every product package is different, the following elements typically appear in packaging designs. Consider these as you put together your final design.
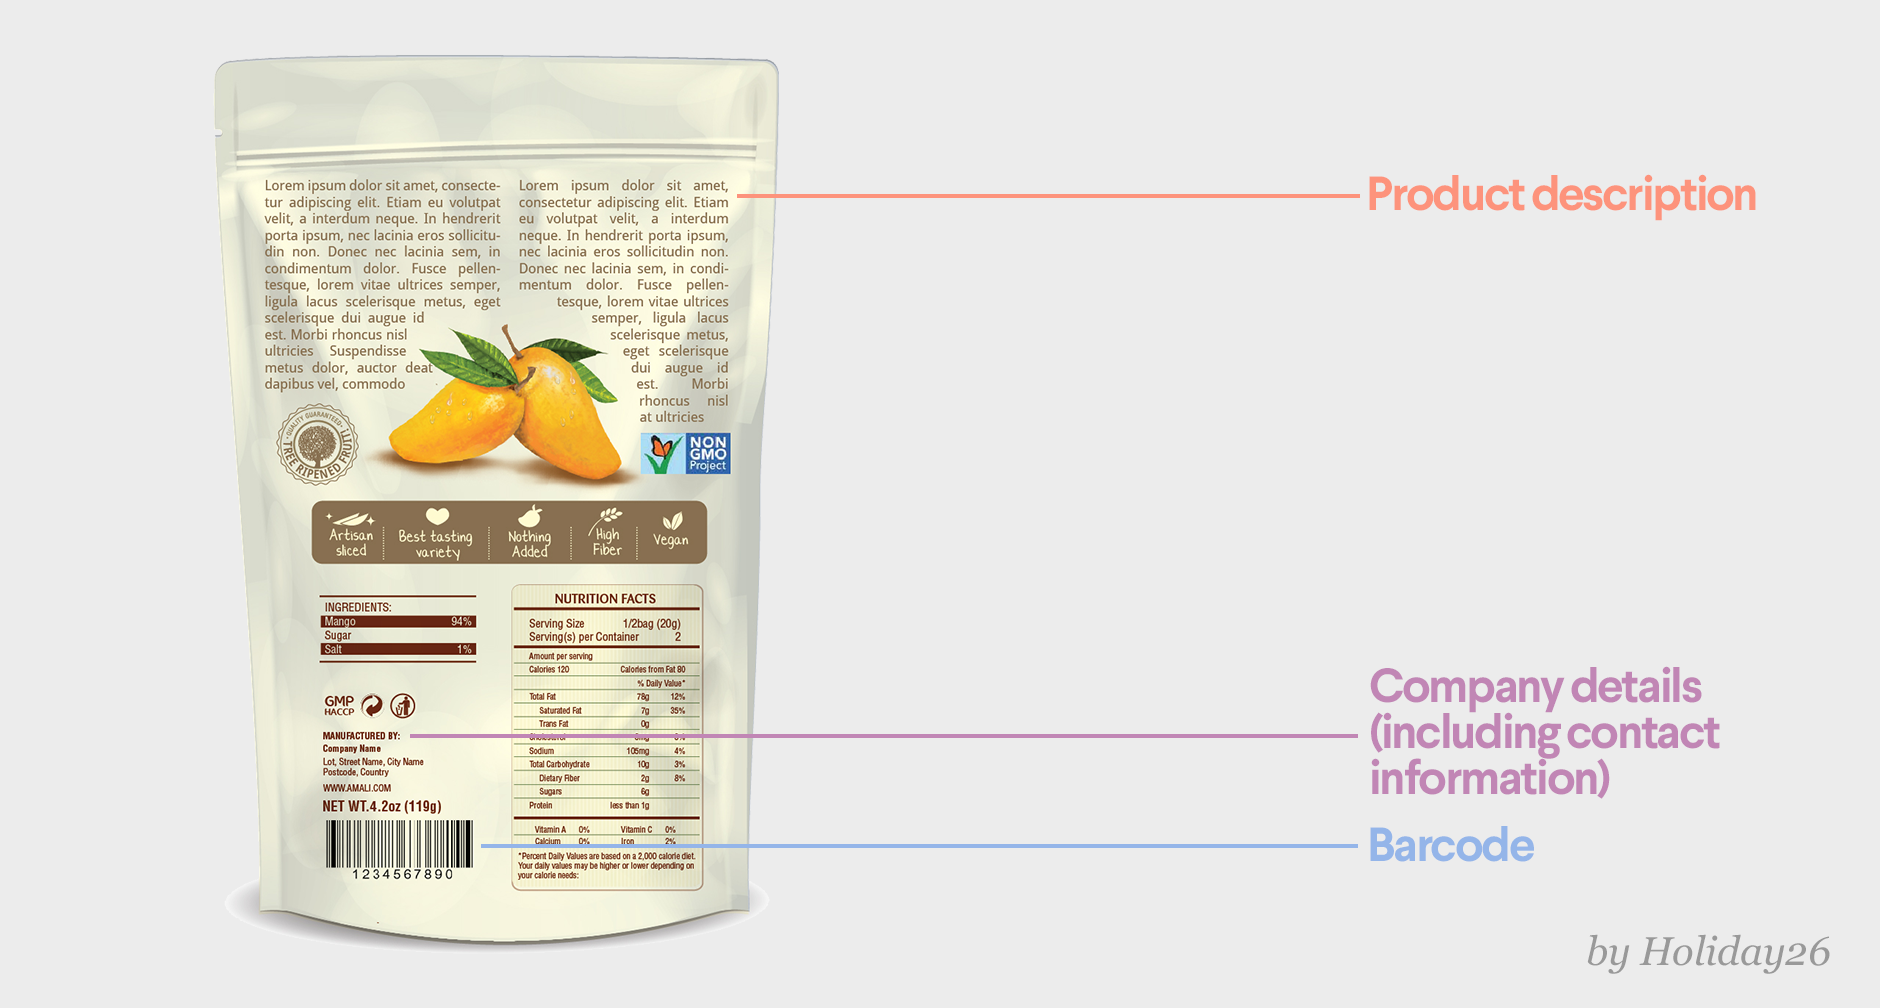
Packaging can also include:
- Certifications
- Serving suggestions or recipes
- Ingredients
- Best before date
Barcode

Barcodes are the machine-readable lines on a package that stores information about a product. There are two types:
- UPC: Universal Product Code, the predominant barcode in North America
- EAN: International Article Number, a global barcode
Depending on the product or industry, you may be required to include a barcode in your packaging design. For details and specifications, contact your client.

The design checklist
The post-design checklist
- Does your design have shelf life?
Visualize the end product and think about how your product design will look on a store shelf and in a consumer’s home. - Don’t forget the details!
Remember to include all the design elements that you are legally required to provide (e.g. expiration dates, nutrition info, etc.).
Only include elements and terms that you’re sure of. For instance, don’t put in “organic” unless your client provides proof their product has been certified organic. - Keep things simple for the clients
When handing over your finished design, be sure to keep different packaging designs in separate files.
Handover
Once your client has approved the final design, send them all of the design files. Here’s what they need:
- An editable version of the final design (AI, PSD, PDF, or EPS)
- All web preview images (JPEG or PNG)
- A link to purchase any commercial fonts used in the design

The dictionary of design
-
 by TheBluebird
 -


Resolution
Resolution is the amount of pixel detail in an image. When designing packaging, you should save it at a higher resolution. 300dpi is recommended.
- High resolution: Many pixels make the image sharp.
- Low resolution: Few pixels make the image pixelated.


Printing techniques
How your design is printed
- 4-color offset: A full color printing process for large volume printing
- Digital printing: Great for small runs and short turnaround times
- Foil ink: Specialty process that uses metallic foil rather than ink
- Spot color: Color generated by an ink (pure or mixed) printed using a single run.
-
by Khramova
-
by Mj.vass
-
by purcari.tiberiu
-
by syakuro


Finishes
The final touches made to your print
- Foil blocking: Metallic, foil finishes applied with a heated stamp
- Embossing: Raised textures applied to the material using heat
- Spot UV: A glossy finish applied to specific areas on the print
-
by syakuro
-
by Paul Coman
-
by oktagon


