Decorative patterns are very powerful design visuals: they adorn famous art, architecture and consumer products, and with the technologies of today can be created digitally at lightning speed.
They look great on textiles, cards, book covers, brochures, websites, iPhone cases and many other applications, and give any design that little extra something! They’re pretty handy to have in stock and are simply fun to make.
Let’s take a look at Illustrator and learn how to create our own pattern swatch in 5 easy steps.
1. Arrange vector elements into a square
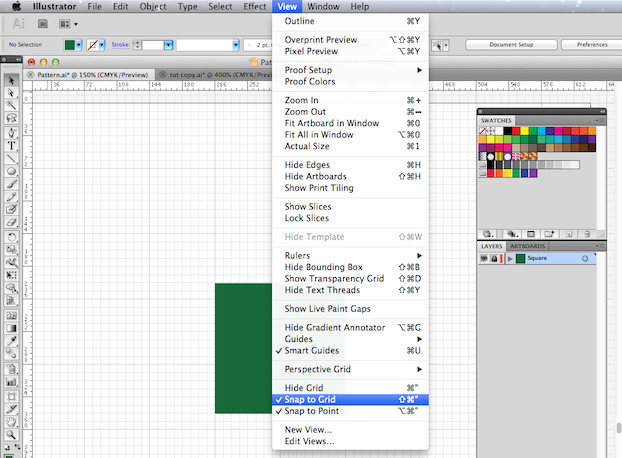
Go to View > Show Grid. Then, make a vector square in the color you want your pattern background to be in.

In the menu bar, select View > Snap to Grid so your square is aligned with the lines of the grid. Lock your the square layer so that it doesn’t accidentally get moved around when you’re trying to make your pattern.
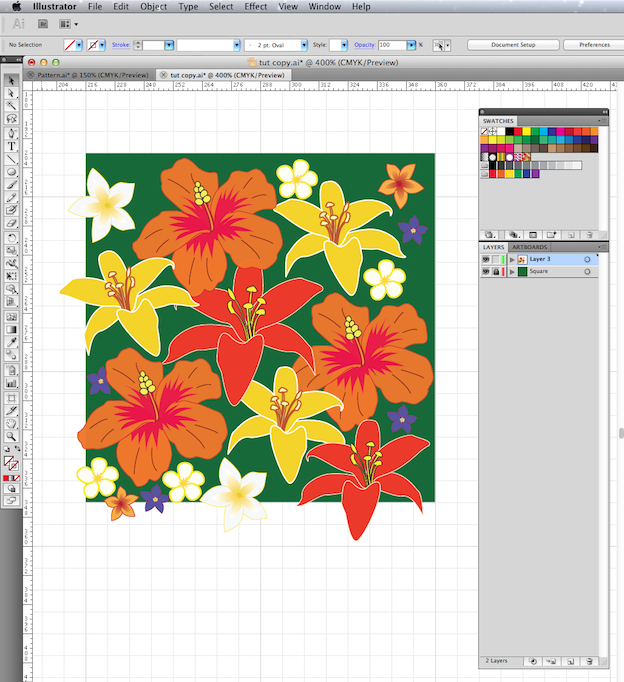
Now you need some vector shapes to create your pattern. I arranged some vector flowers I created in Illustrator.
Make sure they overlap the left and bottom edges of the square.
2. Position your elements
Select the green background square + all the vector flowers that are overlapping the right side of the green square.
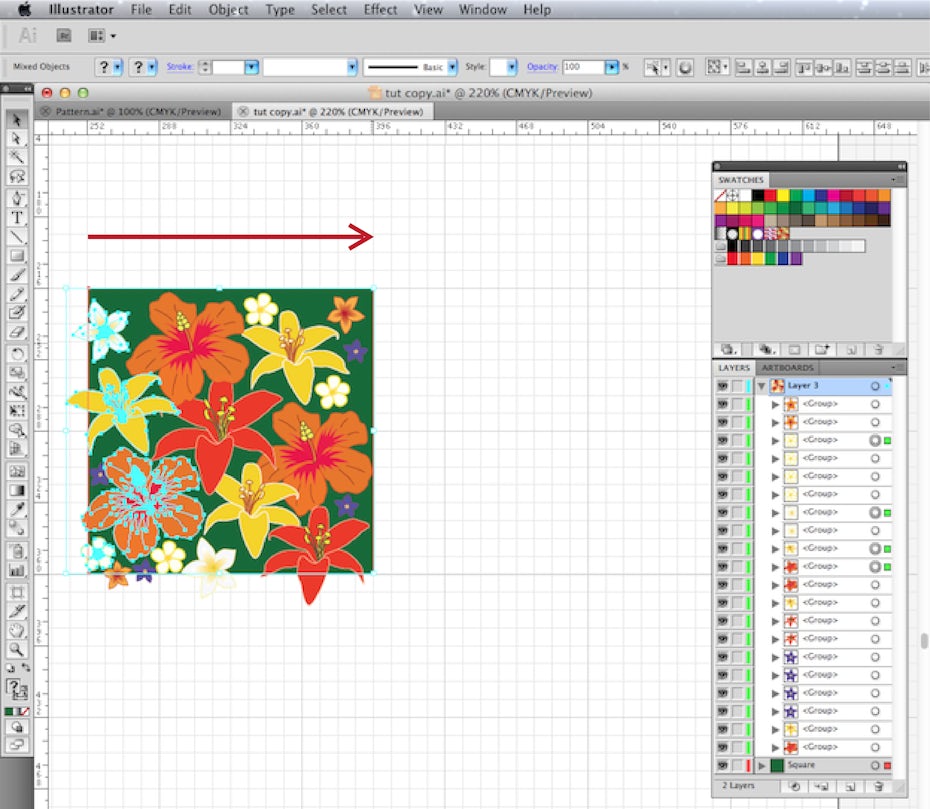
Hold down the “option” key, (this makes a copy of your selection) and drag the selection to the other side of the square. While still holding down the Option key, hold down the Shift key — this will help you line up your selection perfectly with the edge of the square.
For PC users: Option key = alt key
Note: you won’t need the extra green square later, but it’s just to guide you while making the pattern.
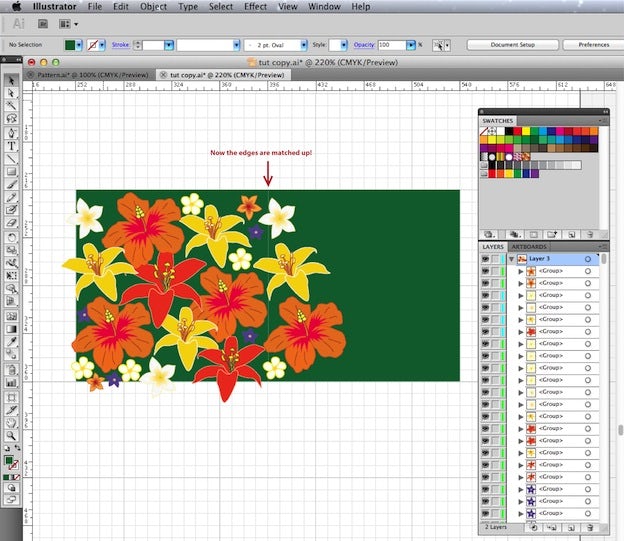
Now, do the same with the flowers that overlap the bottom edge of the square. Select those flowers and the green square, press Option then Shift, and drag the selection up until it lines up with the top edge of the square.
(For PC users: Alt + Shift )
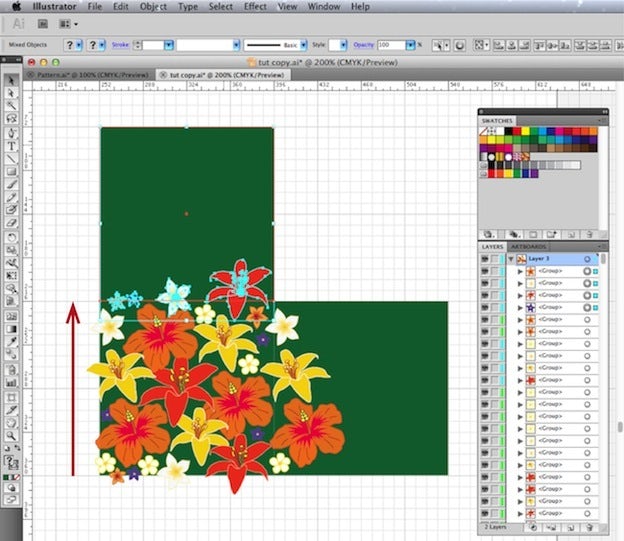
Delete the 2 green squares you’ve just created (you no longer need them), and now you have the basic repeating unit of your pattern!
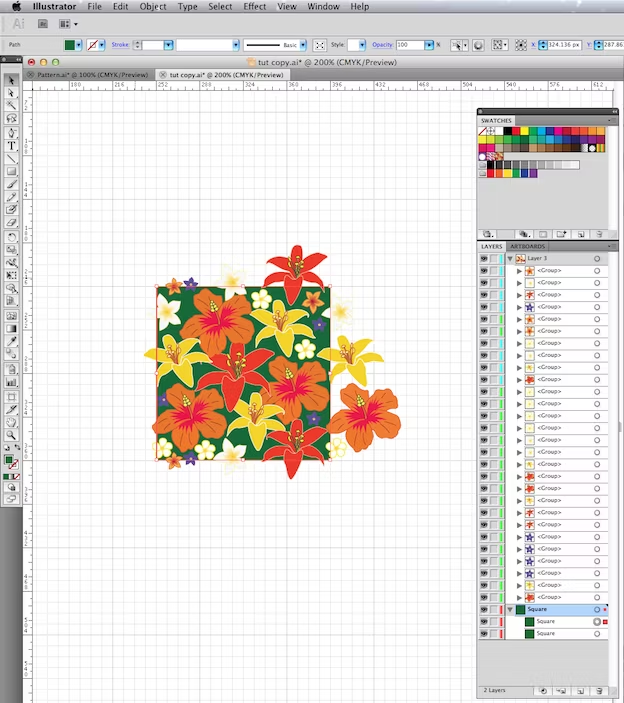
3. Create an “invisible box”
First, we are going to copy the green square and make it a new layer under all the other layers. The easiest way to do this is Command + C + F. (For PC users: Ctrl + C + F)
It might look like nothing happened but it did. 🙂 This made an exact copy of the green background square and place it in the exact position as the original green square.
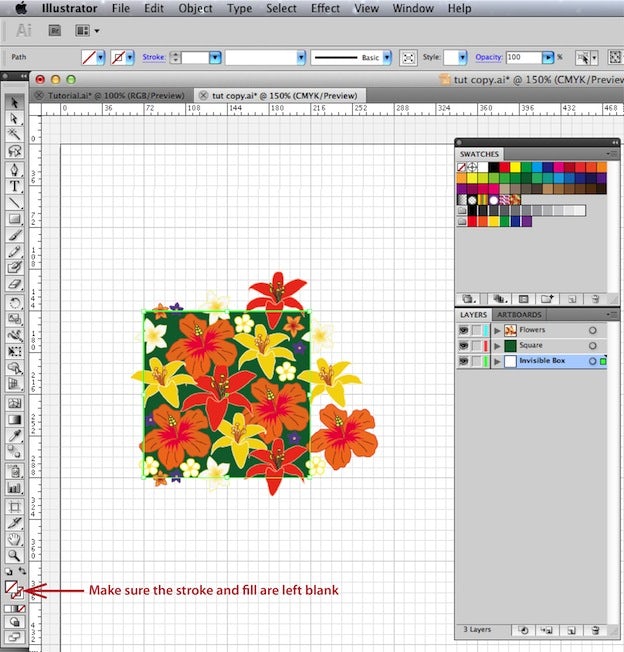
We want to remove the stroke and fill on the bottom square, so it becomes an “invisible box.” The purpose of this invisible box is similar to a clipping mask. When we generate the swatch, Illustrator will read this invisible box as the boundries of your pattern, and it will keep your pattern within the boundries of the box.
You’ll notice the squares are on the same layer, and we need to get to the bottom square. In my example below, I placed the 2nd green square on its own layer underneath the original square. However, if you want to keep the squares on the same layer, then expand the square layer by clicking on the arrow in the Layers Panel — you will notice there is the main layer and 2 path layers.
Now, you can select the bottom path layer and remove the stroke and fill.
4. Drag it into the swatches panel
Now select all and drag everything into the Swatches Panel. A new swatch with your pattern will appear. You’ve made your swatch!
You might have to adjust some of your elements along the way to ensure the pattern is cohesive, and there aren’t gaps between the elements. Just keep experimenting until the pattern looks more to your liking.

5. Voila + save
Now you can fill any shape with your new, completely original pattern swatch!
Select your new swatch from the swatches menu, then click on the rectangle tool and make a rectangle. The swatch will repeat seamlessly and can be applied to any kind of shape.
If you want your pattern to appear bigger or smaller within a shape, then play with the size of your original pattern, and make it a new swatch again, by dragging it into the Swatches Panel.
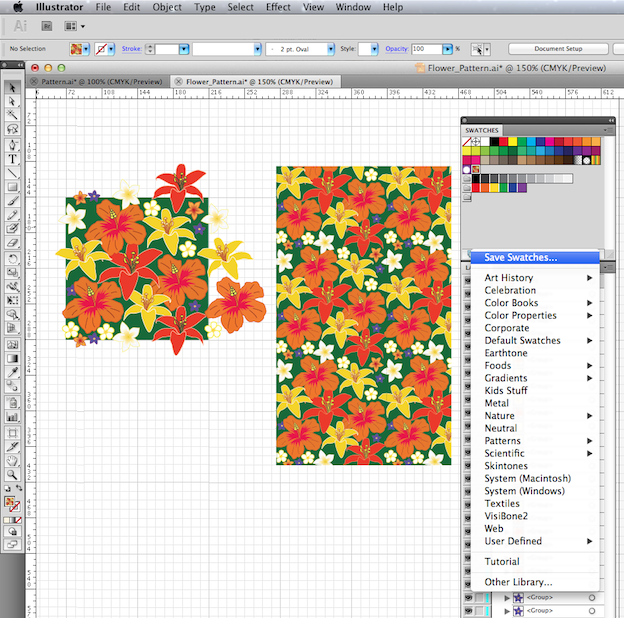
Now that you’re worked so hard on your pattern, you’ll want to save it for future use. Select your pattern swatch, go to the arrow in the right of the Panel and select Swatches Library Menu > Save Swatches.
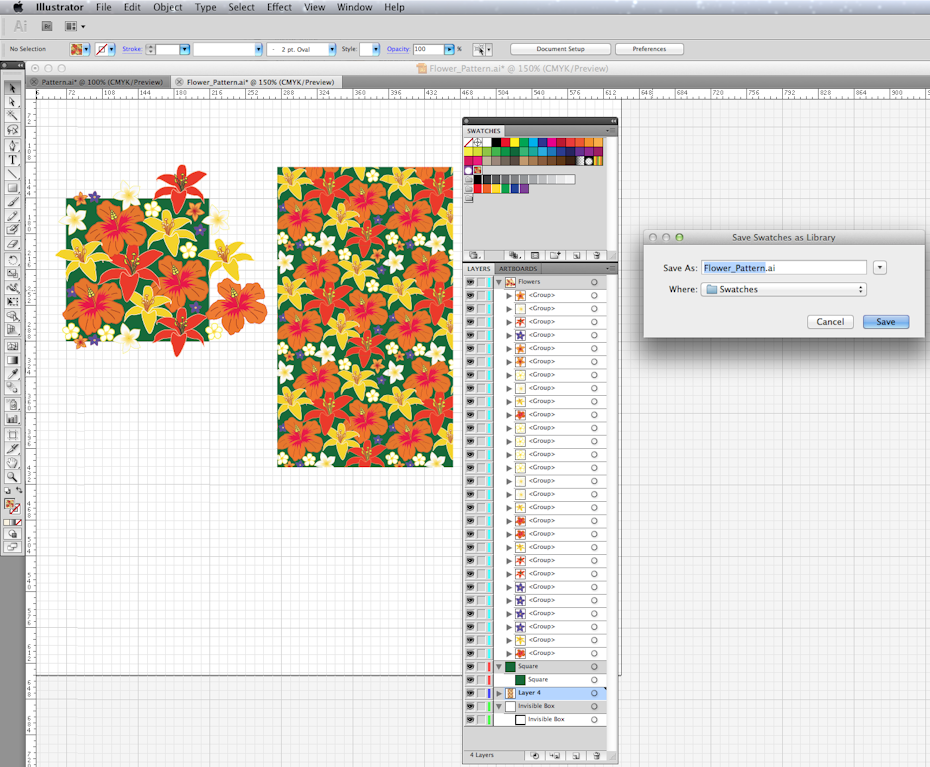
Name your pattern and make sure it’s saved under the “Swatches Folder” in an .ai format.
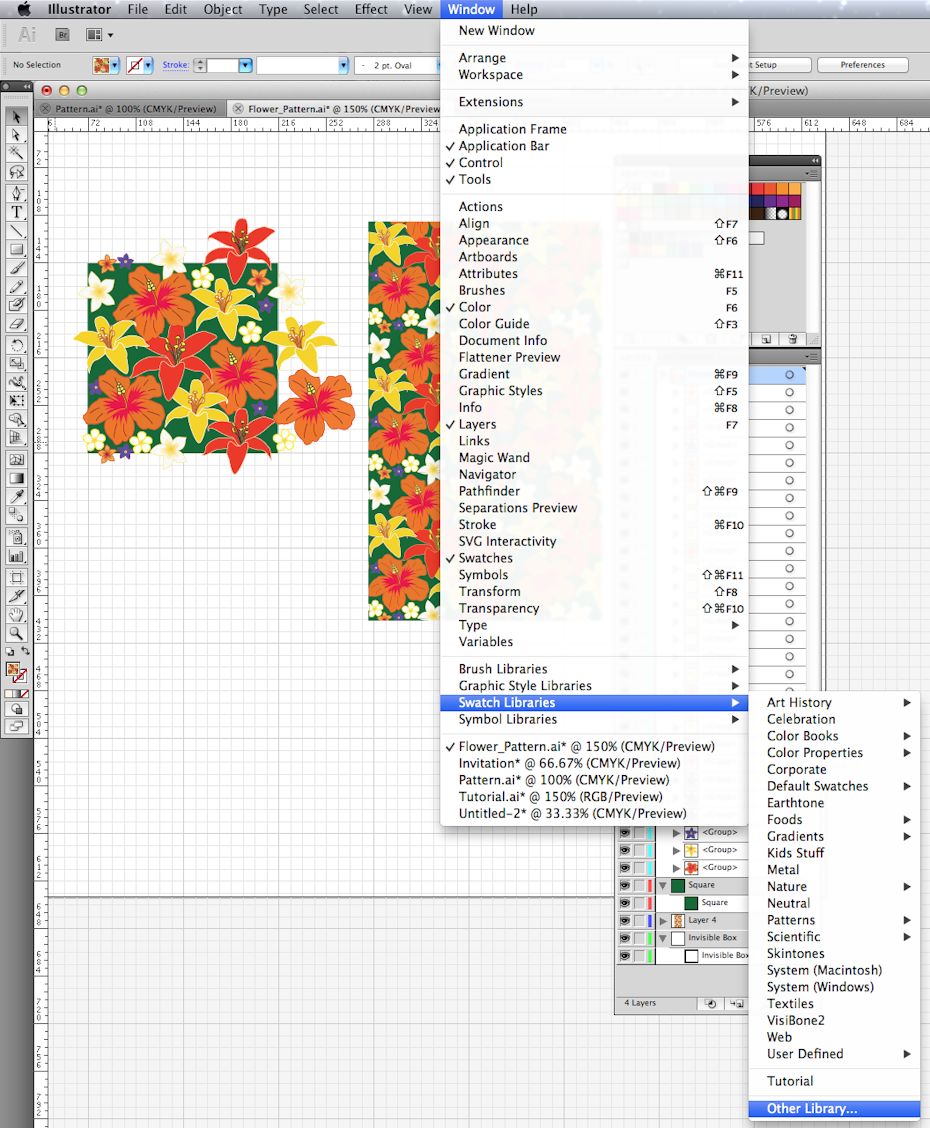
Now that your swatch is saved you can access it by clicking Window > Swatch Library > Other Libraries, where you can locate the .ai file you just saved the swatch in.
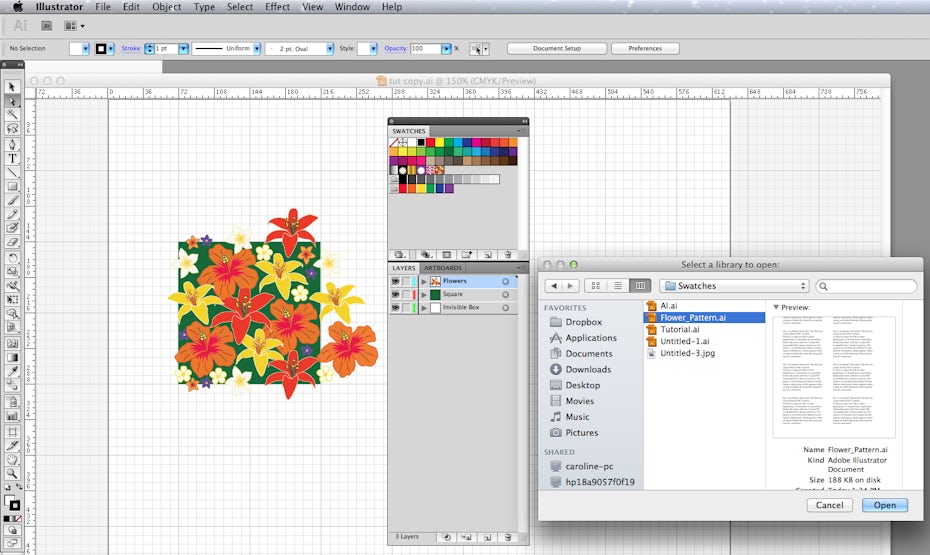
It will open the swatch library with your saved pattern swatch in it.
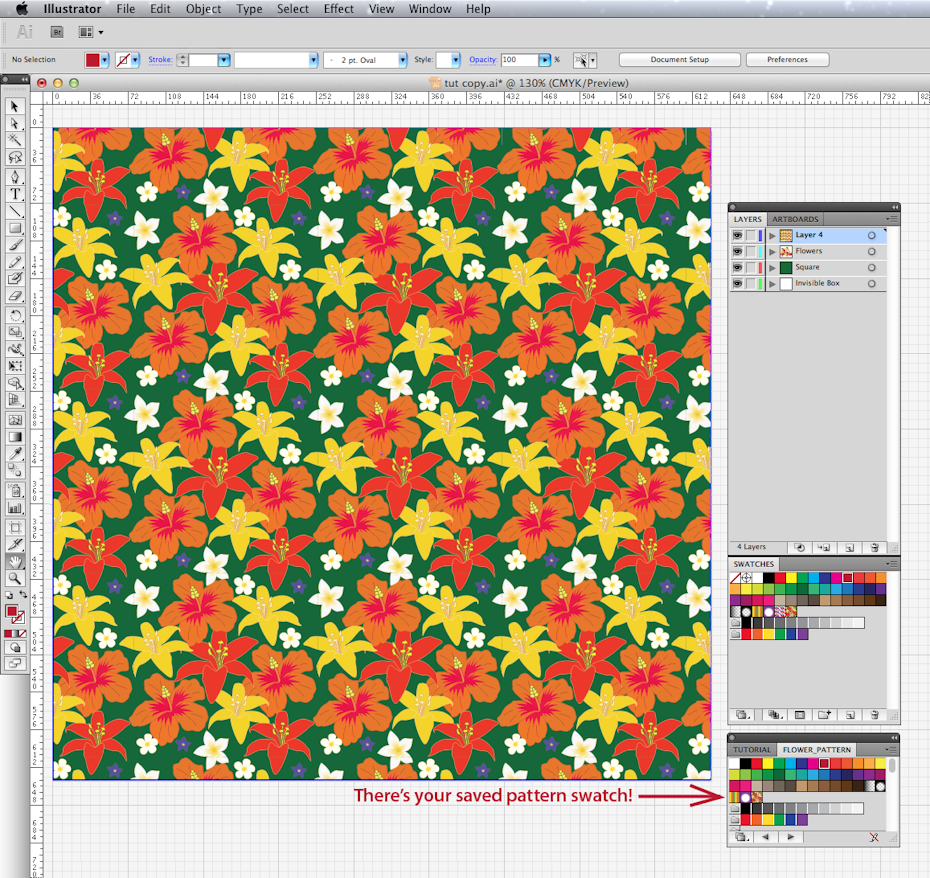
Now that you’ve created and saved a swatch pattern, the possibilities are endless!
Simple exercises like these are a step closer to producing work like these amazing artists:

Book cover: Marian Bantjes
Wallpaper design: Catalina Estrada